")

Let’s continue in the croissant test kitchen! With home-baked croissants, the journey is the reward. And because it takes a few steps until your Danish pastry has enough layers, it’s all the nicer when you take the crispy and flaky croissants out of the oven. Until now, I have always cheated with a few crumbs of yeast. But with this recipe, that’s no longer necessary. Die Croissants aus Plunderteig brauchen nur Sauerteig und keine Hefe. You can leave the dough to rest overnight.
✨ The links with an star* are affiliate links. If you click on one of these links and buy something, I get a small commission and you support my work (thanks for that 🧡). This does not change the price for you. You can find more information on privacy policy here.✨
Ingredients: What you need for croissants with sourdough
- Wheat flour: Type 550 or Bread Flour.
- Water: Cold in summer and lukewarm in winter.
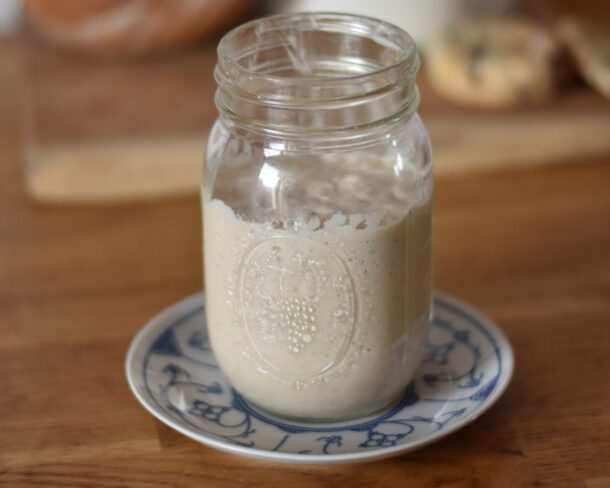
- Sourdough starter: It is not necessary to constantly feed the sourdough starter fresh, but the last refreshment should not be longer than a week ago. If you have a sourdough discard I will be happy to provide you with suitable recipes. My personal method is to feed my sourdough with an equal amount of water and flour. I use a mixture of wheat flour and wholemeal rye flour. If you choose a different water-to-flour ratio for your sourdough, remember to adjust the amount of water in the recipe accordingly. Here are some helpful tips to keep your sourdough starter vital and healthy at all times.
- Soft butter or vegan butter for the dough and for the butter layer.
- Sugar and salt for flavour.
Possible schedule: How to make Danish pastry dough with sourdough
| Day 1 | 5 pm | Mix all the ingredients into a dough, cover and leave to rest. Mould the butter layer and place in the fridge. |
| 6 pm | Stretch and fold the dough and cover again. In winter, leave the dough to rest overnight at room temperature. | |
| Between 8 and 9 pm | Put the dough in the fridge in summer. | |
| Day 2 | 8 am | Place the dough in the fridge. |
| 9 am | Roll out the dough*, fold the butter layer into the dough and make three simple rounds. If the dough gets too warm, place in the fridge for 30 minutes between laminations. | |
| 10 am | Roll out the dough, cut into 12 triangles* and shape into croissants. Brush the croissants with egg or milk, cover and leave to rest. | |
| 11.30 am | Preheat the oven with a steam tray consisting of astainless steel oven dish* and lava stones*. | |
| 12 pm | Bake the croissants until golden brown and crispy. |


Five tips for laminating Danish pastry
Croissants get their airy and flaky texture by laminating the dough. The layers of dough and butter are stacked alternately on top of each other. During baking, the moisture in the butter layers evaporates and ensures a beautiful flaky texture. The folding technique used to create these layers is called lamination.
- Off to the fridge: Keep the dough and the butter layer in the fridge before laminating and put the dough back in the fridge for 30 minutes between each cycle.
- The dough and butter layer should be at the same temperature. If the butter layer is too cold, it can crack. This leads to uneven layers. If it is too warm, the butter will melt into the dough and there will be no layers.
- Turn your dough 90 degrees after each tour. This spreads the layers of butter right up to the edge of the dough. You can also cut off the edges of the dough after each tour using a pizza cutter*. However, you then run the risk of the butter being squeezed out when you roll it out.
- Press the dough flat with your rolling pin* before rolling it out. This will ensure that the butter layer is also rolled flat and not just shifted or, in the worst case, pressed out of the dough.
- And one last tip: If you don’t have an air-conditioned kitchen, midsummer is probably the wrong time of year to bake croissants.
How to shape the sourdough croissants
What to do with stale croissants?
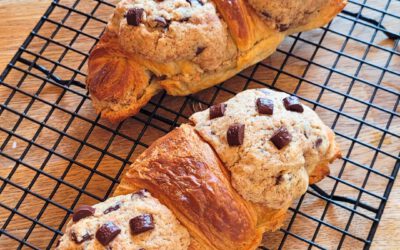
This recipe makes 12 croissants and they taste best fresh. If you still have croissants left over two days later, you can easily turn them into crispy almond croissants with a frangipane filling.
Helpful tools – My recommendations
✨ The links with an star* are affiliate links. If you click on one of these links and buy something, I get a small commission and you support my work (thanks for that 🧡). This does not change the price for you. You can find more information on privacy policy here.✨
- A Danish Whisk* – especially if you don’t use a kitchen machine. This allows you to mix your ingredients without the whole dough sticking to the spoon.
- A wooden rolling pin*.
- A steam tray consisting of a stainless steel oven mould* and lava stones*. The tray is filled with the stones and placed on the bottom of the oven during preheating. When you put your bread in the oven, pour hot water onto the stones. This creates steam, which ensures that your bread rises well.
- A cooling rack* for bread, rolls and waffles.
- A pizza cutter* for sweet knots, croissants etc.
- A sharp bread knife*.
You can find more product recommendations here.
More recipes with Danish pastry
Le Crookie – Viral Cookie Croissant from Paris with Sourdough
Today I have a little experiment for you. On the one hand, it’s an unusual combination of ingredients and on the other, I want to see if TikTok trends might appeal to the rest of the internet. If you’ve been on social media in the last few weeks, you’ve probably…

Step by Step Sourdough Pain au Chocolat – French Chocolate Croissants
Danish pastry is a real all-rounder! In this blog post, I’ll show you how to bake crispy, flaky sourdough pain au chocolat. You can also use the same dough to make german Franzbrötchen, vanilla danish pastry, sourdough croissants or danish pastry with cheese filling….

Quick and Easy French Almond Croissants with Crispy Frangipane – Recipe from Scratch
Almond croissants are perhaps even more decadent than classic croissants. They contain even more butter as well as sweet syrup and ground almonds. It’s hard to believe that this is actually a leftover recipe. The French almond cream Frangipane gives old croissants a…

Basic Recipe: Croissants Made from Danish Pastry with Sourdough
Ingredients
- 300 g water
- 50 g sourdough starter
- 500 g wheat flour bread flour (or Typ 550)
- 50 g soft butter or vegan butter
- 25 g sugar
- 1 tsp. salt
Butter Layer
- 200 g soft butter or vegan butter
- 40 g wheat flour
Other
- egg or milk or a plant-based milk
Instructions
Day 1
- For the dough, mix the flour, water, sugar, salt, butter and sourdough starter.
- Cover the dough and leave to rest at room temperature for about an hour. Then stretch and fold once.
- In winter, leave the dough to rest overnight at room temperature. In summer, leave the dough to rest for two to three hours at room temperature and then place in the fridge overnight.
- For the butter layer, mix 200g soft butter with 40g flour. Then place in the centre of a sheet of baking paper. Fold the baking paper around the butter so that a 20 x 20 centimetre square of butter is enclosed in the baking paper. A rolling pin helps with this.
- Place the butter layer in the fridge overnight.
Day 2
- Roll out the dough into a square and place the butter plate (without the baking paper) in the centre of the dough. Fold the corners of the dough around the butter plate to form an envelope.
- First round: Carefully flatten the dough with a rolling pin* and roll out until you have an elongated rectangle.
- Fold in a third of the dough on the left-hand side and fold the right-hand third over it so that there are three equal layers of dough on top of each other.
- Wrap the dough in a tea towel and place in the fridge for 30 minutes.
- Then unwrap the dough again, carefully flatten with a rolling pin* and roll out into a long rectangle.
- For the second round, fold the rectangle in again to create three layers of dough.
- Perform a total of three rounds. Place the dough in the fridge for 30 minutes between batches.
- After the third round, the dough is rolled out into a large rectangle.
- Use a pizza cutter* to cut the long side of the rectangle into six equal pieces. Divide each of the six rectangles diagonally to create twelve triangles.
- Carefully stretch the triangles and roll them up under tension to form a croissant.
- Place the croissants on a baking tray, brush with milk, water or egg, cover and leave to rest for two to three hours – depending on the room temperature.
- Brush the croissants again with milk or egg before baking.
- Preheat the oven to 230 degrees using a steam tray consisting of a stainless steel oven dish* and lava stones*.
- Bake the croissants for 10 minutes with steam and about 20 minutes without steam or until they are golden brown.
Have you tried one of my recipes?
⭐⭐⭐⭐⭐
You would help me a lot if you would rate this recipe and write your feedback in a comment. Thank you! 🧡
Feel free to show me how it turned out! Link @kruemelig on your Instagram or Facebook post or use #kruemelig. If you want to remember the recipe for later, feel free to save it on Pinterest!


0 Comments